DIY Clay Christmas Ornaments
This Post May Contain Affiliate Links. Please Read Our Disclosure Policy
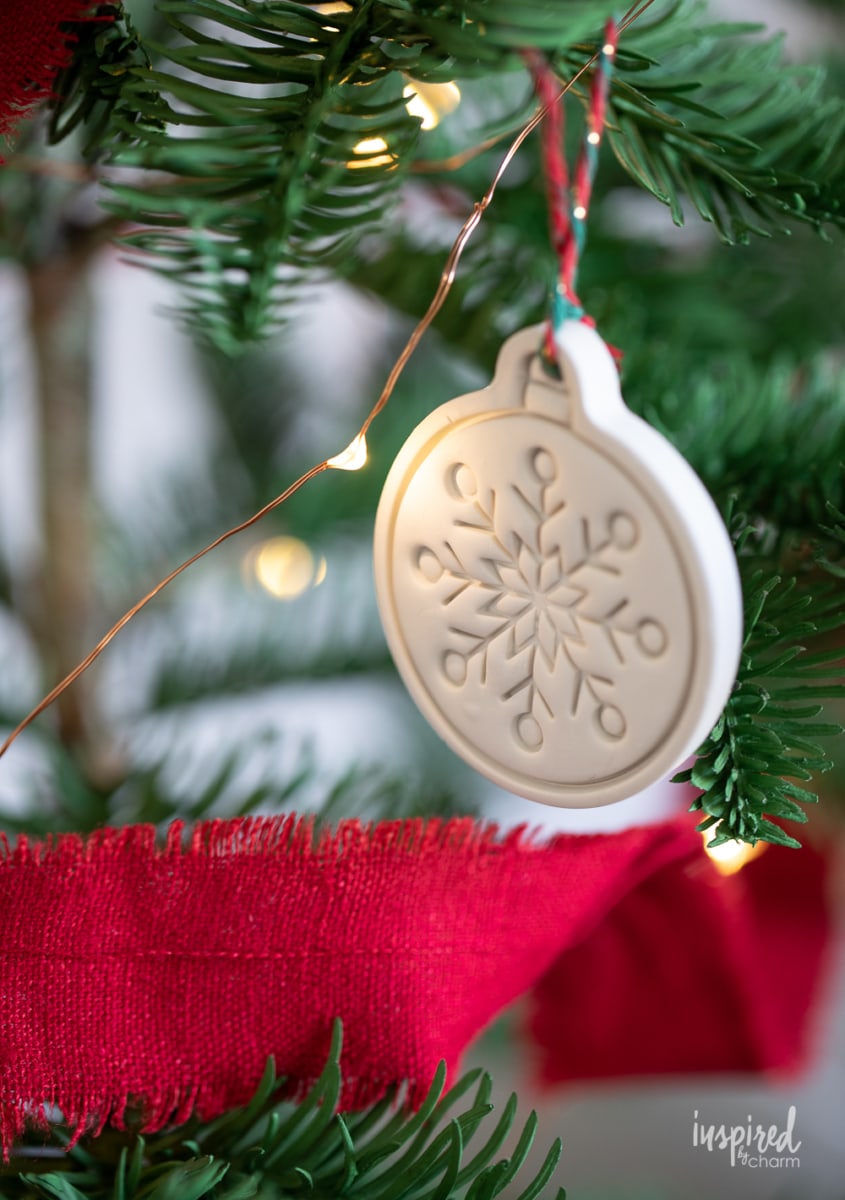
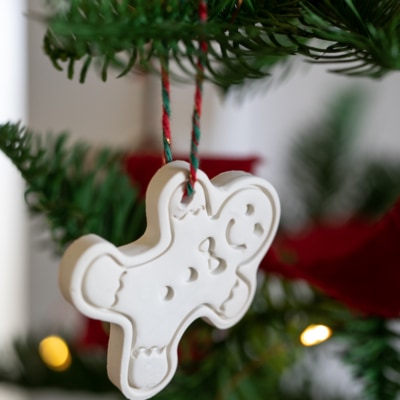
Skip the store-bought ornaments and try these DIY Clay Christmas Ornaments for a handmade holiday you’ll love. Using oven-bake clay and simple cookie cutters, you can craft unique and beautiful ornaments perfect for your tree, gifts, or garlands. This is a fun and easy homemade Christmas decor idea that anyone can do. The results are beautiful, professional, and totally festive!
Handmade Clay Christmas Ornaments
This Christmas I really felt the urge to skip the stores and instead go with DIY for a lot of my Christmas decor. My goal is to create a handmade holiday and that’s exactly what I’m starting to do. This past week I crafted several different handmade ornaments and garlands and I couldn’t wait to share them with you. We’re going to kick things off with these adorable DIY Clay Christmas Ornaments.
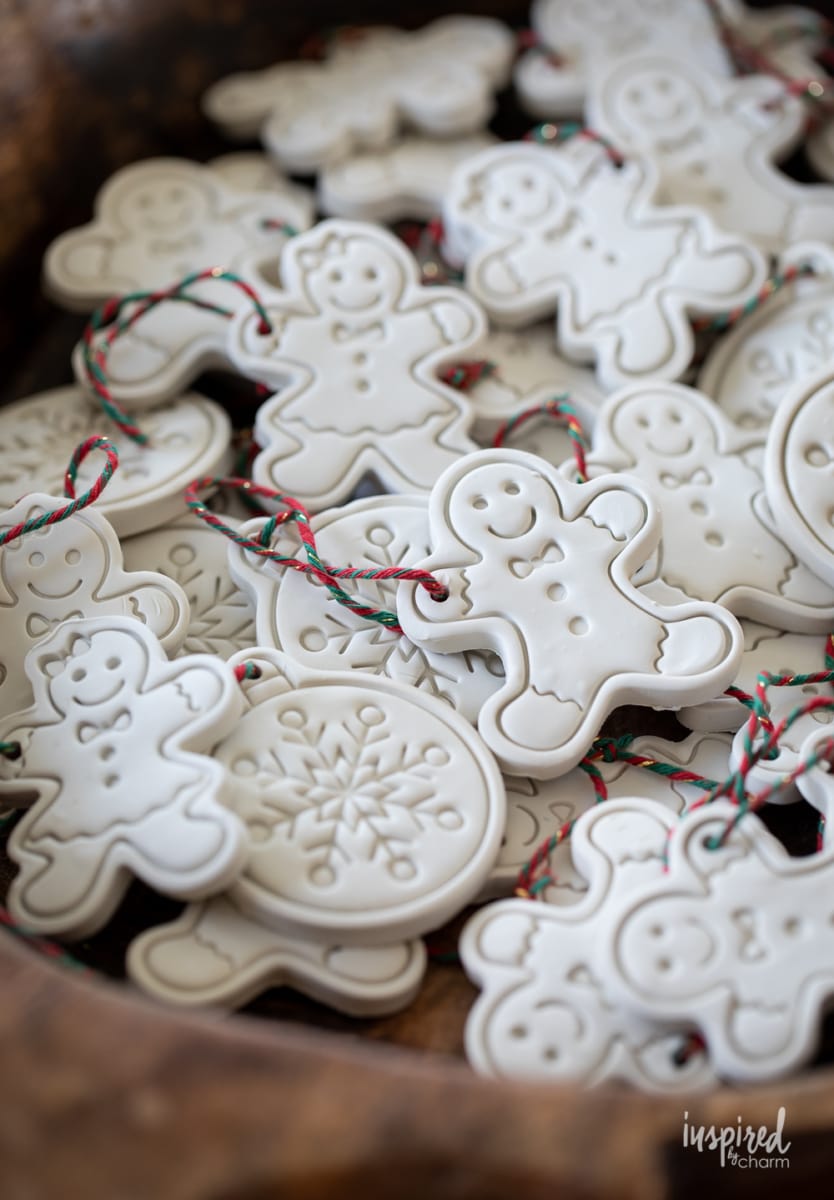
You will be surprised at how easy these are to make and as you can see, the decor impact speaks for itself. If you’re looking for a fun holiday craft, I highly recommend these DIY Clay Christmas Ornaments.
Why I Love This Project
Need a few more reasons why you need to try this handmade holiday project? You’ve got it.
- It’s Handmade: There’s something special about handmade/homemade items during the holiday season. These ornaments aren’t just decorations—they’re memory-makers. Whether crafting solo or with friends and family, this project offers a wonderful opportunity to slow down, embrace the holiday spirit, and enjoy a meaningful moment of creativity together.
- Easy and Gorgeous: You will be so surprised at how easy these are to make while still giving you beautiful results. With just a few materials and some basic tools, you can create ornaments that look polished and professional without a steep learning curve. It’s a simple way to add a personal and handmade touch to your holiday decor.
- Multiple Uses: I created these to hang on my tree, but you could also use them as gift toppers, turn them into jewelry, give them as a gift, have them be a vase filler, fashion them into a garland, and the list could go on and on! Their handmade quality adds a heartfelt touch that store-bought decorations just can’t match, making your holiday all the more special.
Ready to get started? Let’s make some Christmas ornaments!
Materials
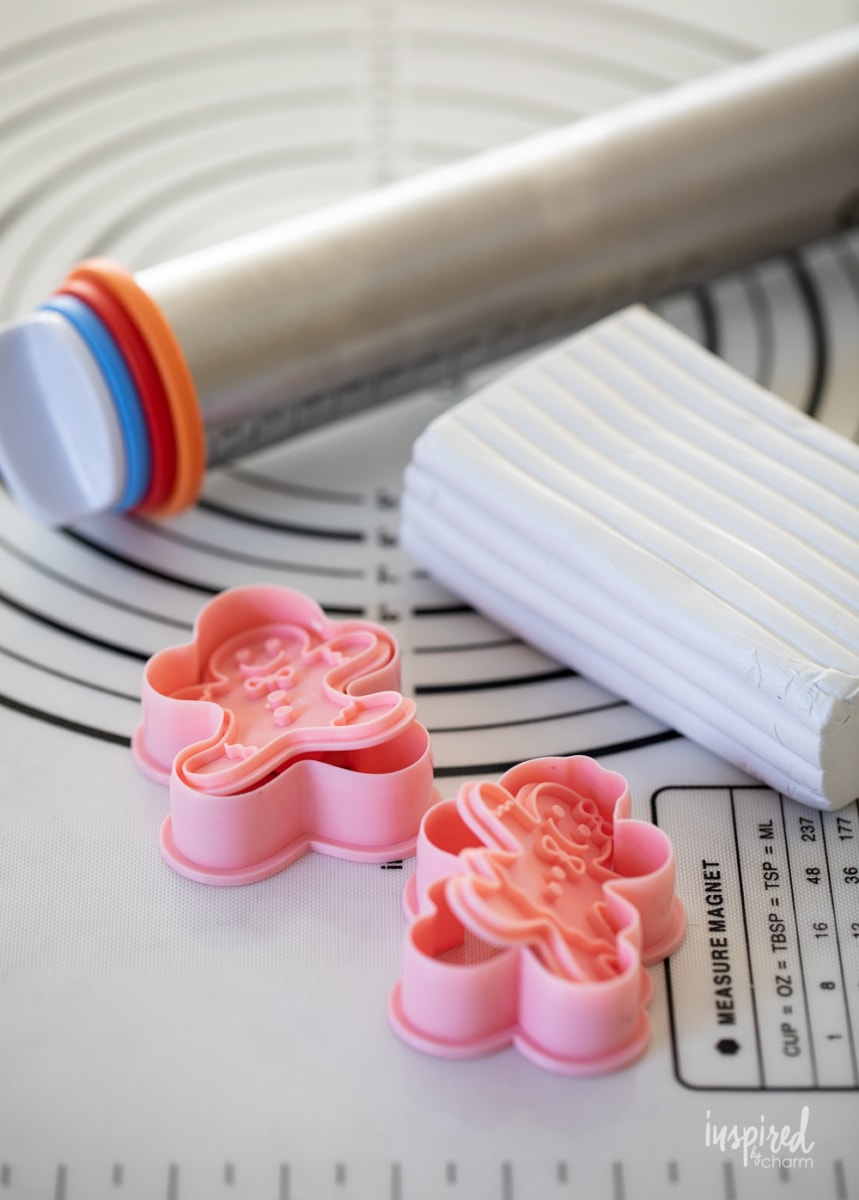
Before we get started, let me walk you through the materials list. I will share links to the exact products I used to create these Christmas ornaments.
- oven bake clay – I really like this Sculpey brand clay. It’s worked well for me in the past and I loved it here too.
- rolling pin – I purchased this rolling pin for the project. What I love about this rolling pin is that it can be customized to roll a perfectly consistent thickness. It was a game changer and made the process really simple.
- stamp-style cookie cutters – I used these cookie cutters. I found them to be a perfect size and they worked great for this project. If you want a smaller ornament, try these.
- baking sheet – These baking sheets are a kitchen essential for me.
- parchment paper – You’ll want to add it to your baking sheet to protect it. I really like these precut sheets.
- toothpick – A wood skewer would also work.
- twine or ribbon – You’ll need something to hang your ornament. I used a decorative twine like this one.
- silicone mat (optional) – You can use wax paper instead. The mat (or wax paper) helps prevent the clay from sticking to your surface.
Now that you have what you need, it’s time to start crafting!
How to Make
I will walk you through the steps to make these DIY Clay Christmas Ornaments here. I’ve also provided a full materials list and craft instructions in a printable card below.
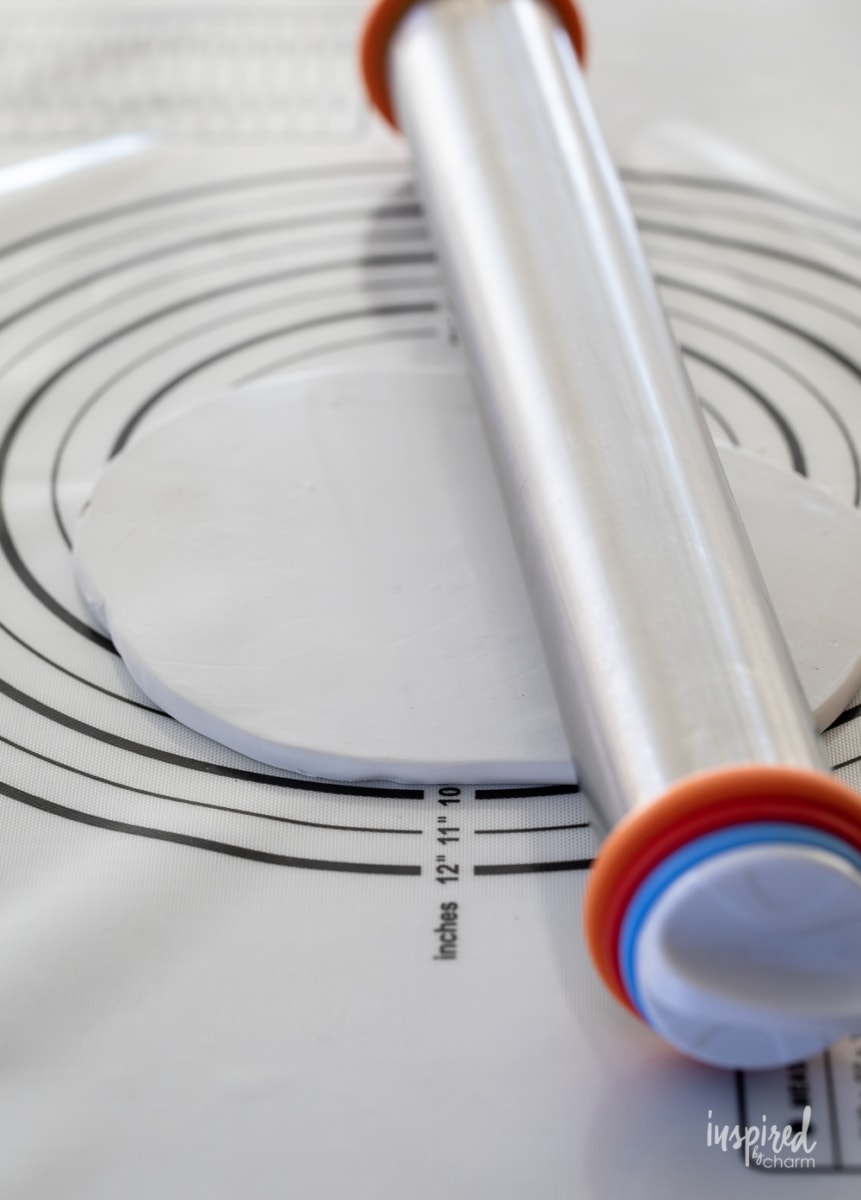
- Begin by rolling out about a cup of clay to a 1/4-inch thickness.* (I recommend working on a silicone mat or wax paper to prevent your dough from sticking to your surface.)
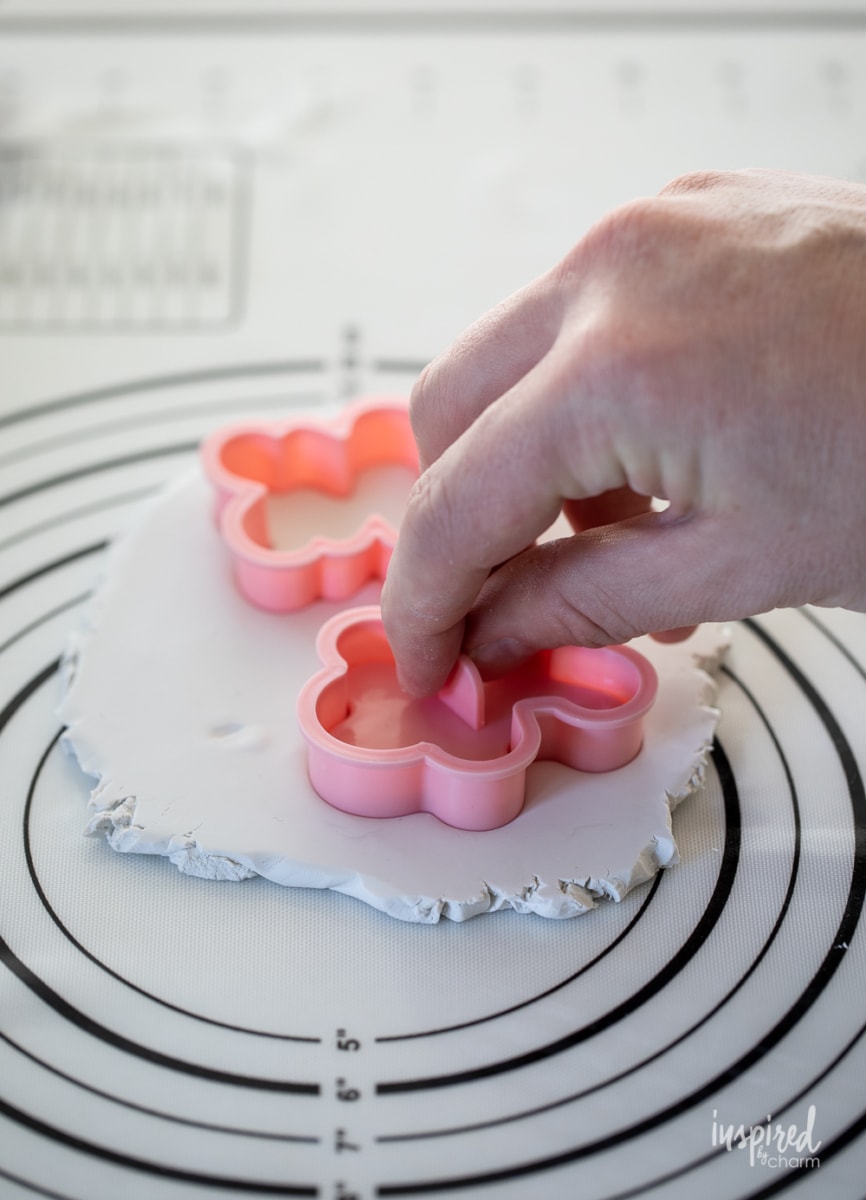
- Press your cookie cutter into the rolled-out clay.
- With your cookie cutter still in place, press the stamp inside the cookie cutter. Apply even pressure to transfer the design.
- Remove the stamp. Remove the cookie cutter.
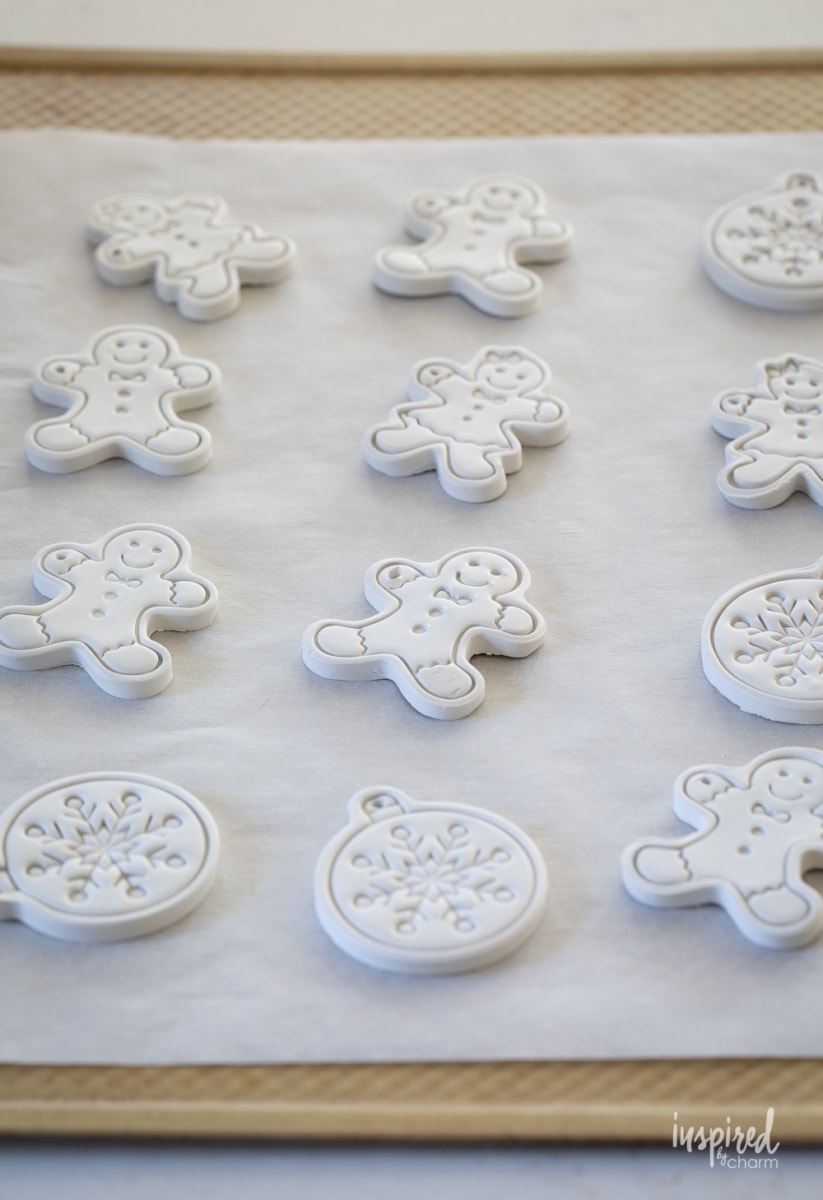
- Transfer the clay cutout to a parchment-lined baking sheet.
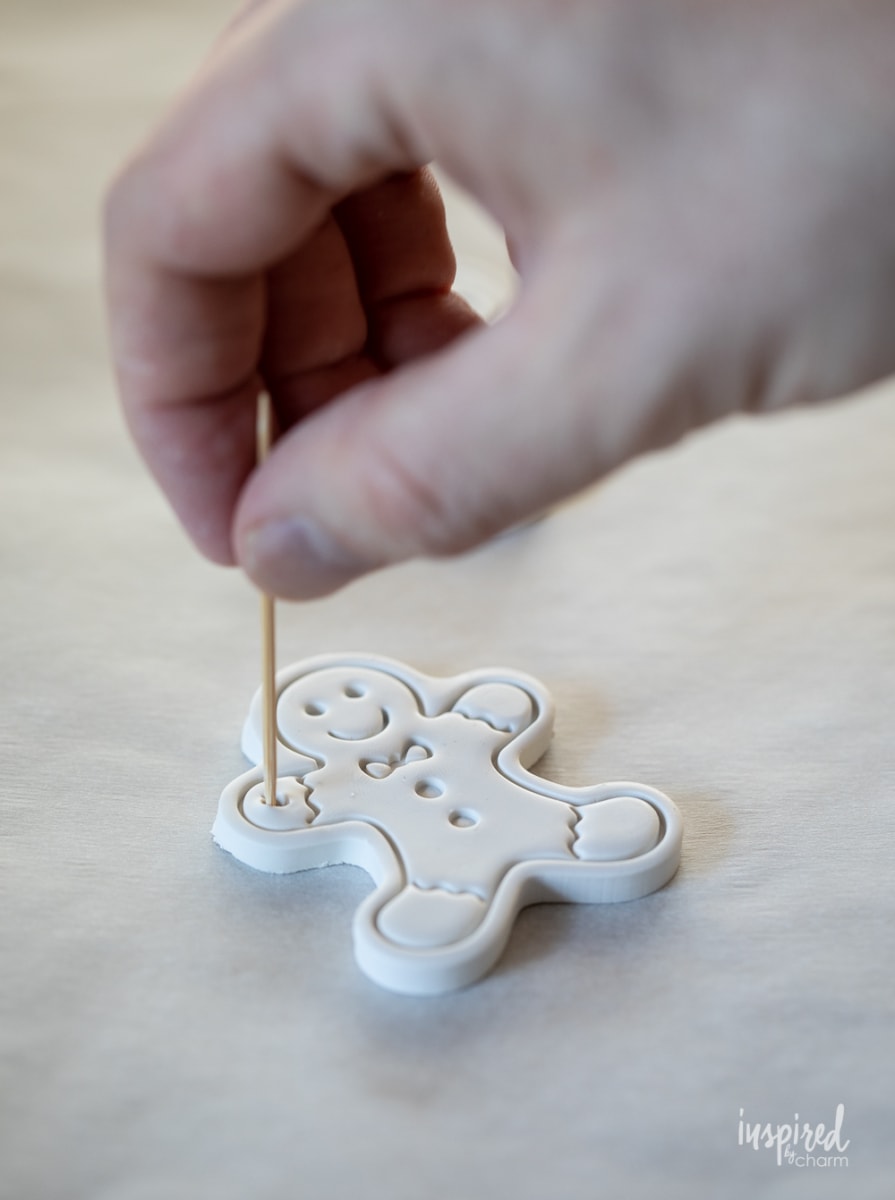
- Use a toothpick to create a hole in the cutout. Ensure the hole is large enough to fit a piece of twine, ribbon, or an ornament hook. (If you end up needing to enlarge the hole after the baking process, use a power drill and drill bit.)
💌 SAVE THIS POST / RECIPE!
- Repeat the above process with the remaining clay or until you’ve created your desired number of ornaments.
- Bake at 275 degrees F for about 17 minutes. (This is the time suggested for 1/4-inch thick ornaments. If your thickness varies, adjust the baking time according to the package directions.)
- Remove from the oven and allow to cool completely on the baking sheet.
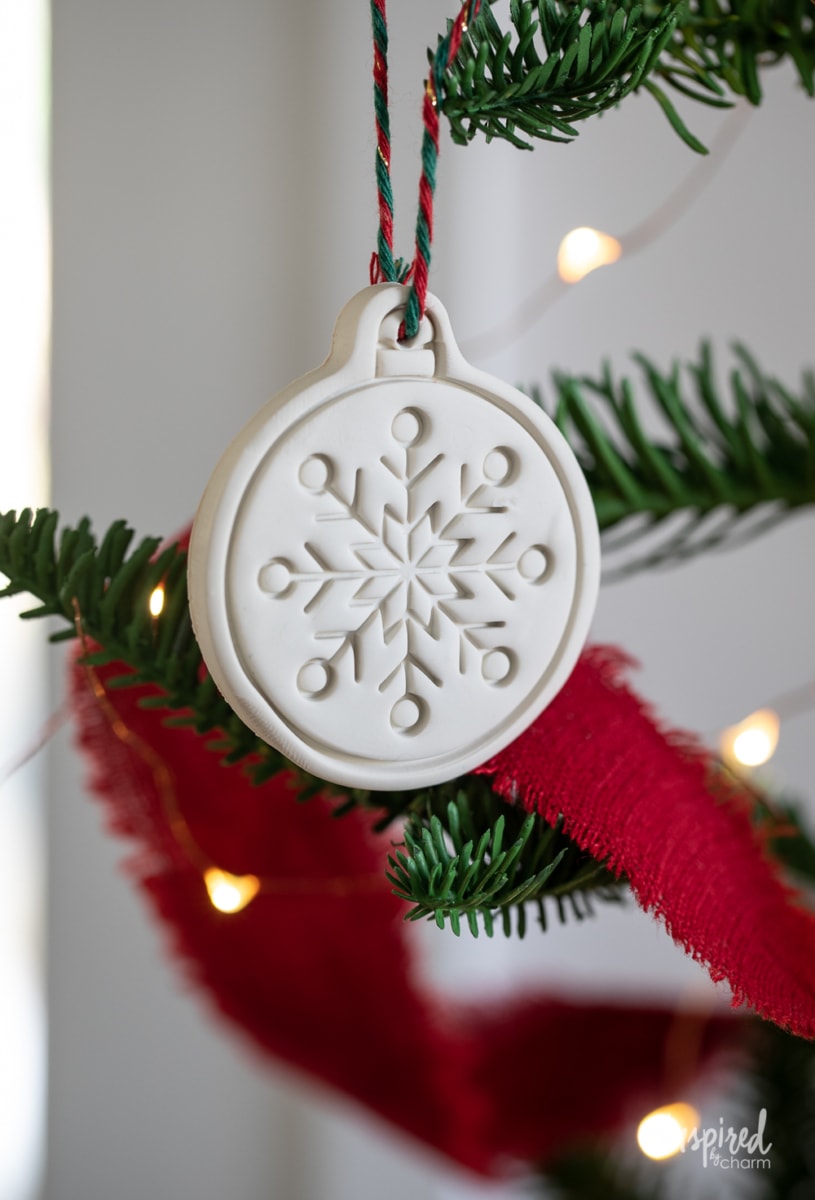
- Thread the hole with twine, ribbon, or an ornament hook.
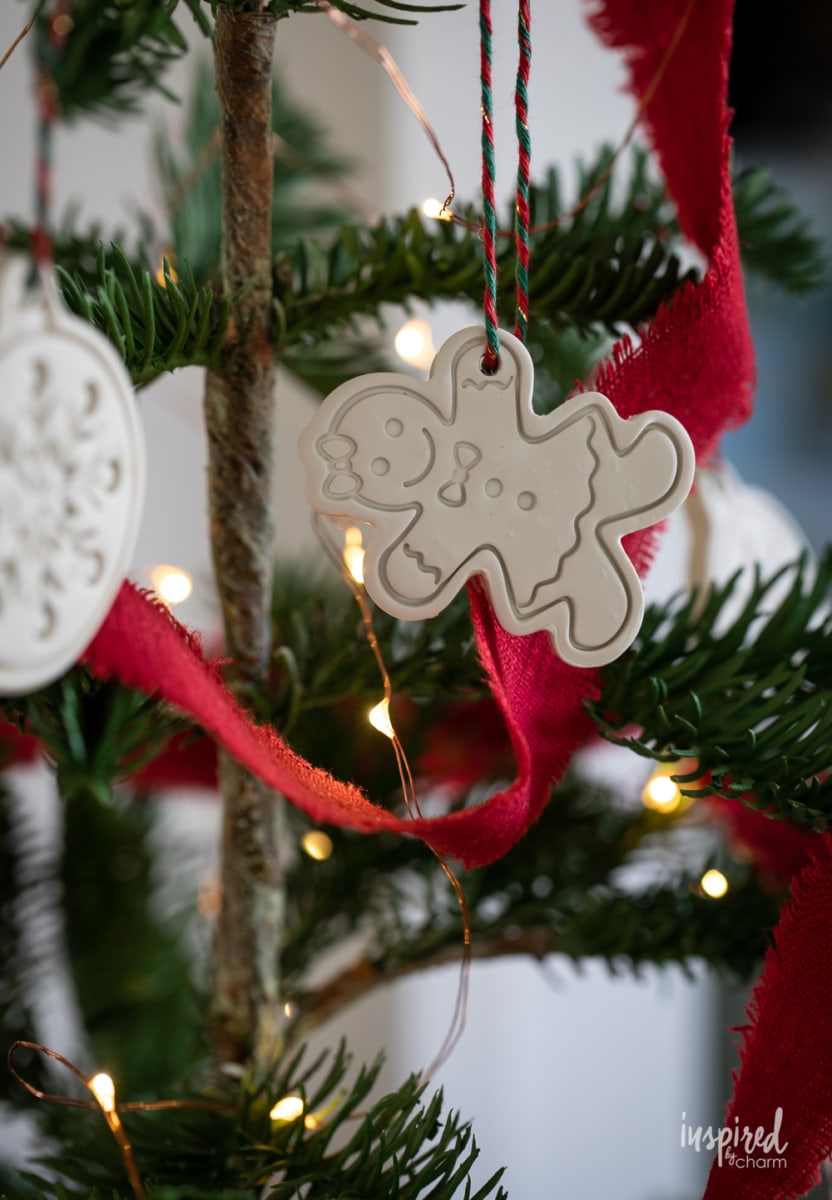
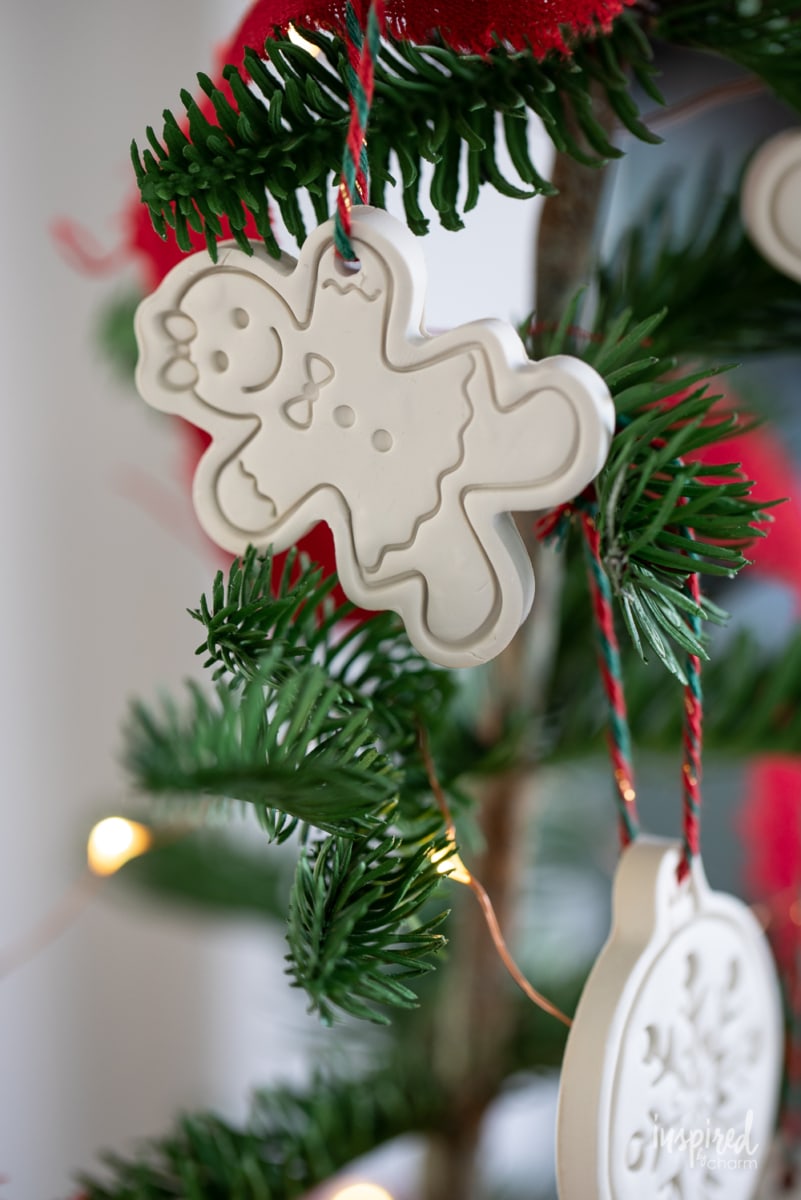
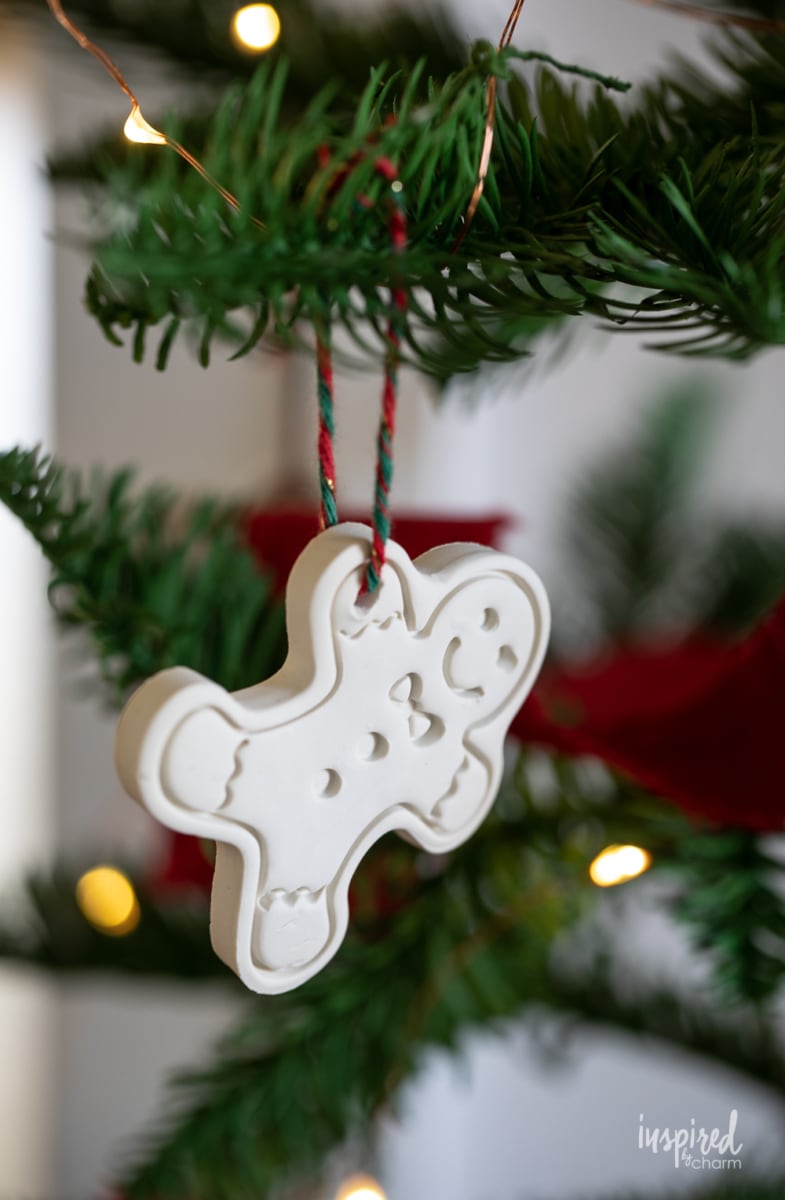
Now you’re ready to hang the ornament on your Christmas tree, decorate a package with it, or use it in any creative way you wish!

Don’t you love them?
Project Variations
I love these ornaments just as pictured, but feel free to get creative.
- I left my ornaments plain. Feel free to paint, add glitter, etc. This is your craft to design as you wish.
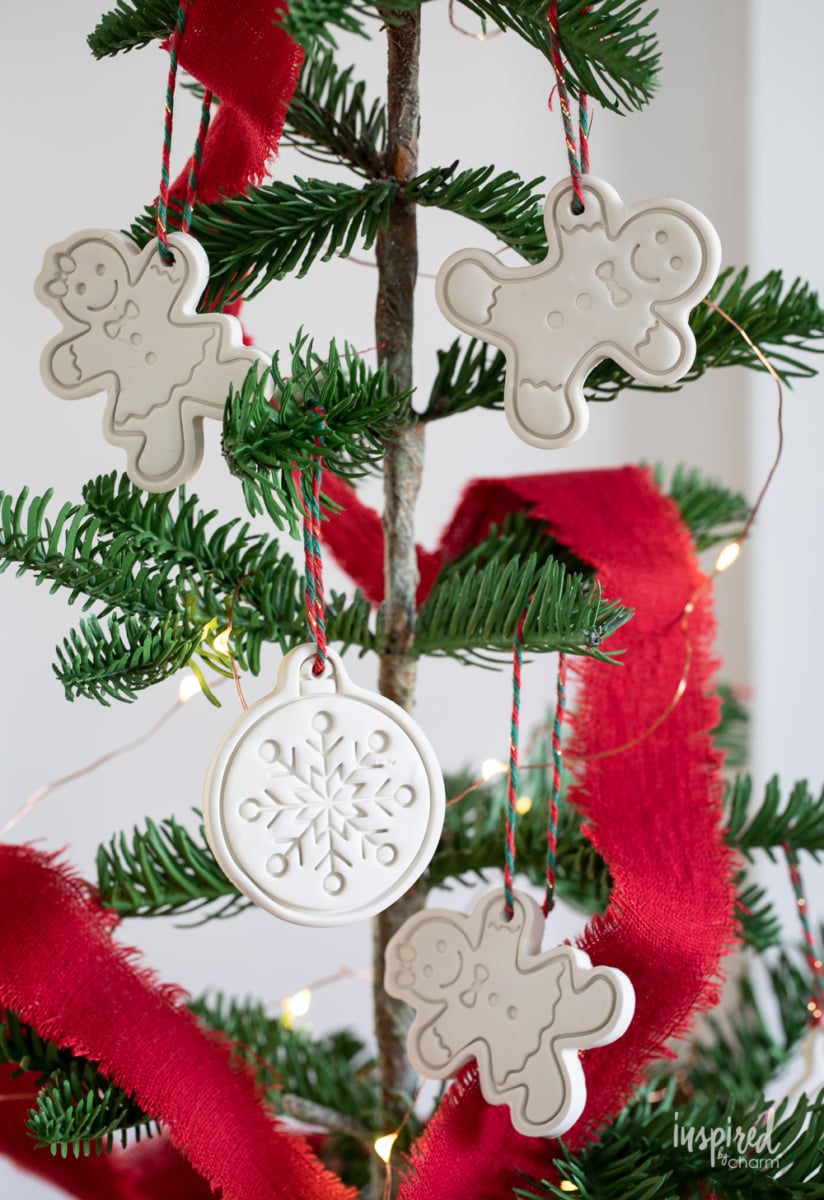
- I used the gingerbread people and bauble cookie cutter designs, but feel free to use whichever ones speak to you.
- You can also use different color clays to match your decor or esthetics.
- If you want to get super creative, skip the cookie cutters and design your own shapes. Or use the cookie cutters you have, and draw on a design with a toothpick.
Have fun and make these ornaments your own!
Frequently Asked Questions
Can I use air-dry clay instead of oven-bake clay?
Yes, you can use air-dry clay if you prefer, but the final result may be slightly different. Air-dry clay doesn’t require baking and may take longer to fully harden. Keep in mind that it may be less durable than oven-bake clay, so it’s better suited for ornaments that won’t be handled frequently.
How can I add color to my ornaments?
You can add color by painting your ornaments after they’ve baked and cooled. Acrylic paint works well for this and is easy to apply. You could also mix in mica powder or pigment into the clay before rolling it out for a more subtle effect. Finish with a clear sealant for added durability and shine.
What should I do if my clay sticks to the surface while rolling?
If the clay sticks, try working on a silicone mat or wax paper to reduce sticking. You can also lightly dust the surface with cornstarch or flour to make rolling easier. Avoid adding too much, as it may affect the texture of the clay.
How should I store these ornaments after the holidays?
Store your clay ornaments in a cool, dry place, preferably in a container with padding to protect them from breakage. Wrapping each ornament in tissue paper or placing them in individual compartments will help keep them in great shape for years to come.
More Holiday DIY Projects You’ll Love
- Vintage-Inspired Christmas Gift Bags
- DIY Christmas Cookie Bags
- DIY Vintage Bobbin Christmas Garland
- Handmade Marshmallow Wreath
- Wood Bead Garland
- DIY Wood Stockings
And that’s a wrap on these DIY Clay Christmas Ornaments. You’re ready to get crafting.I hope you enjoyed this project and are looking forward to more homemade Christmas decorations.
If you give this project a try, I’d love to hear what you think! Please stop back and leave a comment and a 5-star rating below.
Want more from Inspired by Charm? Join the IBC Mailing List for inspiration in your inbox! Follow along on Instagram and TikTok for daily updates and behind-the-scenes looks at my processes. There’s even more inspiration on Facebook and Pinterest!
Ingredients
- oven bake clay
- rolling pin
- stamp-style cookie cutters
- baking sheet
- parchment paper
- toothpick
- twine or ribbon
- silicone mat optional
Instructions
- Begin by rolling out about a cup of clay to a 1/4-inch thickness.* (I recommend working on a silicone mat or wax paper to prevent the dough from sticking to your surface.)
- Press your cookie cutter into the rolled-out clay. With your cookie cutter still in place, press the stamp inside the cookie cutter. Apply even pressure to transfer the design.
- Remove the stamp. Remove the cookie cutter. Then transfer the clay cutout to a parchment-lined baking sheet.
- Use a toothpick to create a hole in the cutout. Ensure the hole is large enough to fit a piece of twine, ribbon, or ornament hook.**
- Repeat the above process with the remaining clay or until you’ve created your desired number of ornaments.
- Bake at 275 degrees F for about 17 minutes. (This is the time suggested for 1/4-inch thick ornaments. If your thickness varies, adjust the baking time according to the package directions.)
- Remove from the oven and allow to cool completely on the baking sheet.
- Thread the hole with twine, ribbon, or an ornament hook.
- Hang on your tree, decorate a package, or create a garland.
Hi! This looks like so much fun to do as a family! How many ornaments would you say you could get with one package of the kind you linked here?
I didn’t count unfortunately. I’d say 3-4 dozen.
xo Michael
You should have mentioned that after using all the utensils with the clay, the utensils should never be used for food items.
What about your baking sheet if you use parchment paper? Is it still not safe?
Love this idea and plan on giving it a try. I’m for sure going to order the rolling pin, pretty sure it will come in handy even after this project.
Everything you post is always so inspiring. I can’t wait to make this with my family one night…maybe even do a garland. Thanks for sharing. These are adorable.
You are so kind Beth! Thank you so much!! YES – it would be so cute as a garland. I want to do that too.
xo Michael
So cute! I’m buying ingredients today! Where is your fabulous sparse tree from, if you don’t mind sharing? Thank you!
I’m sorry I don’t have a source for that tree. It was from a small shop several years ago. Have fun crafting the ornaments!
xo Michael